Showing posts with label guest. Show all posts

Wednesday, June 15, 2011

Cloth Diapering -- Making Cheap "Daddy Flats!" -- Guest Post

When I began cloth diapering, I relied mostly on pockets because they were easy; stuff and wear! As my cloth diaper journey progressed, I slow began to understand covers, fitted, and prefolds/flats, and if we do have another baby, I'll consider using prefolds and covers because those are more affordable than purchasing pockets. And Sarah Goodrich has provided an even more innovately cost-saving method for flats -- "Daddy" Flats!

Disclaimer: I can barely sew, so please excuse all the mistakes.

I wanted to try some "daddy flats" but couldn't find much info on them, or a pattern, so this is how I made them. I used DH's (dear husband's) old t-shirts, and love how they work as diapers. Soft, a little stretchy, absorbent, and free! Can't beat that! The wash-and-driability of flats with the convenience of a prefold. And did I mention free?


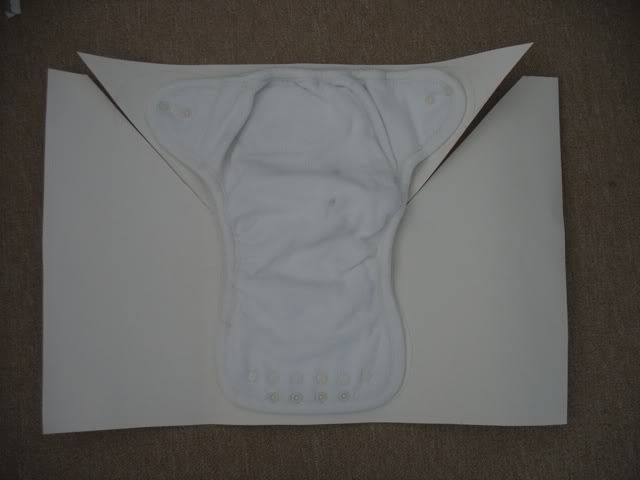
Trace a diaper on posterboard. This is a MEOS (Mother-Ease One Size). I traced it generously and stretched out the tabs. Cut down diagonally to make wings. The tabs are cut a little lower so they fit into the diaper when it's all folded up.
Click the image to open in full size.

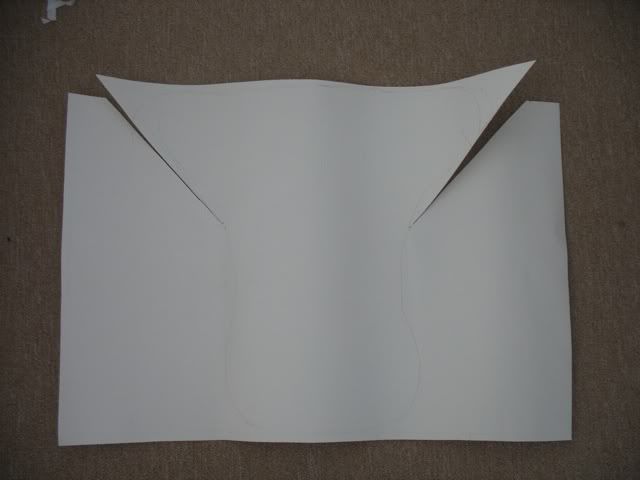
Now you have a template.
Click the image to open in full size.

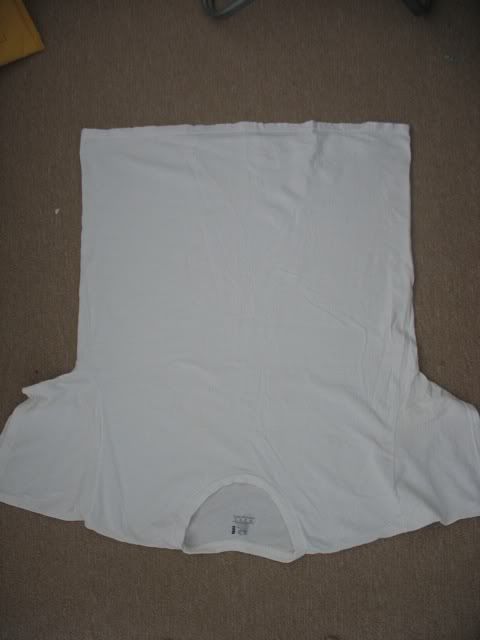
Turn t-shirt upside down (for easier cutting) and spread flat. This is a men's x-large, which is a great fit on my 24 lber. I've also used men's large and youth large; these are very forgiving so you can use just about anything and tweak it.
Click the image to open in full size.

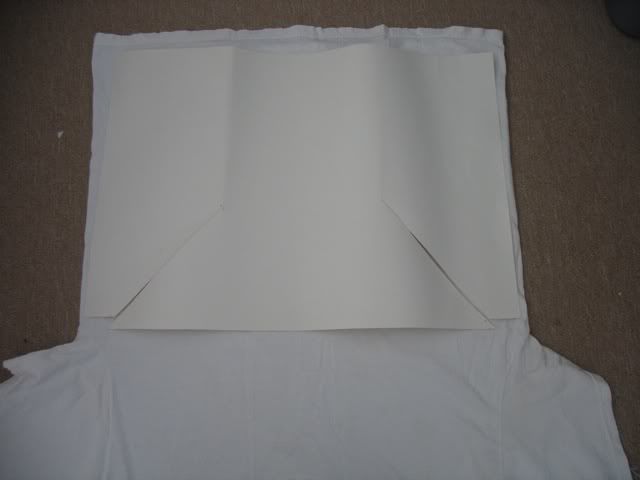
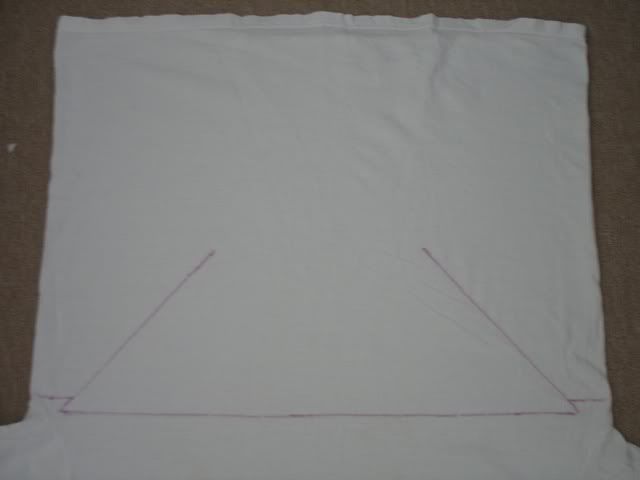
Borrow your kid's washable marker and trace template onto shirt.
Click the image to open in full size.

Take off the template and this is how your shirt looks.
Click the image to open in full size.

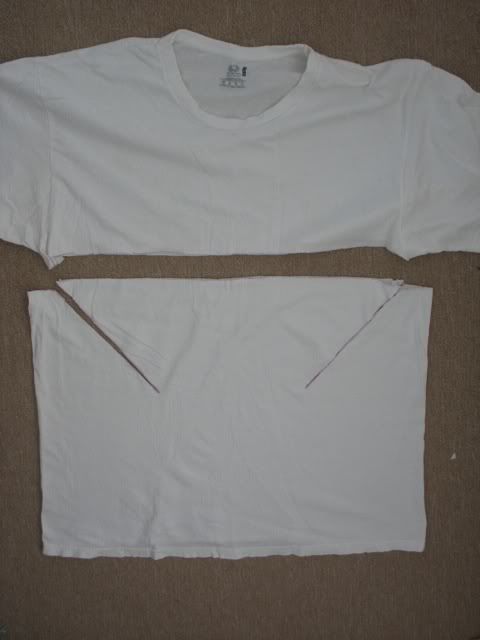
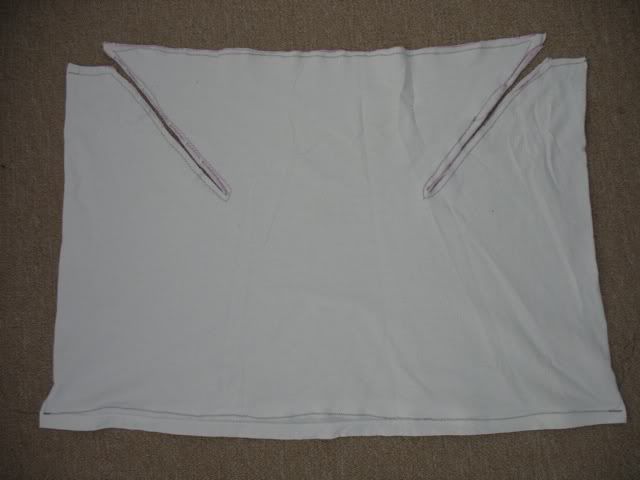
Cut along the lines. Now you'll only be working with the bottom half of the t-shirt.
Click the image to open in full size.

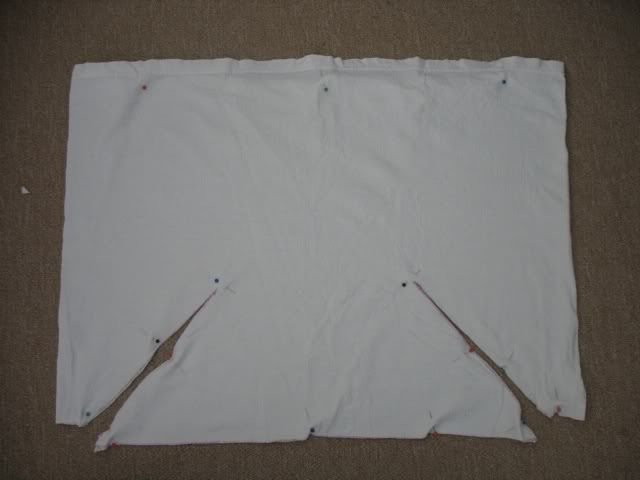
Pin now while it's all flat. If you want to turn and topstitch and make it all pretty, you'll want to turn it inside out before pinning. Put the pinheads on the cut side of fabric so you don't stick yourself while sewing.
Click the image to open in full size.

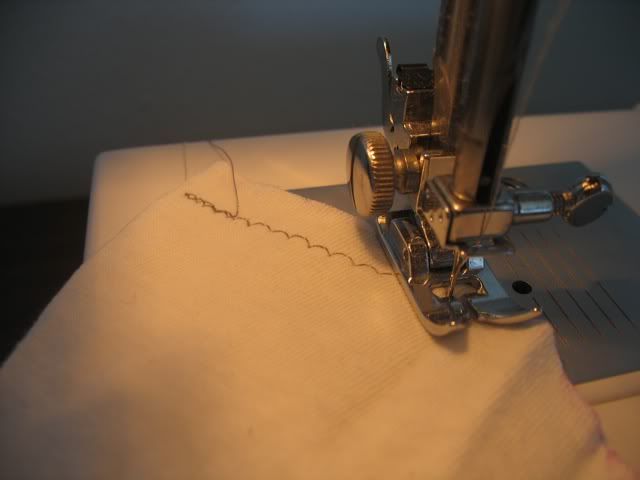
I can barely sew, and didn't care how these looked, so I just zigzagged around the edge, and used up random colors of poorly-wound bobbin thread. This material won't fray anyway. Use a ballpoint needle and poly thread if you can! That made such a difference for me.
Click the image to open in full size.

All sewn together.
Click the image to open in full size.

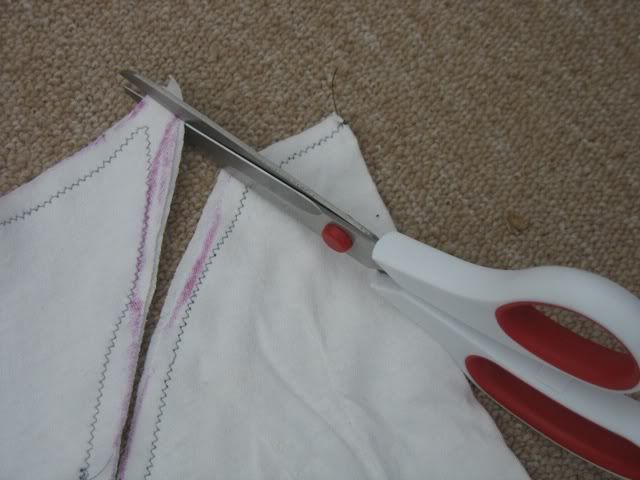
Trim to neaten up.
Click the image to open in full size.

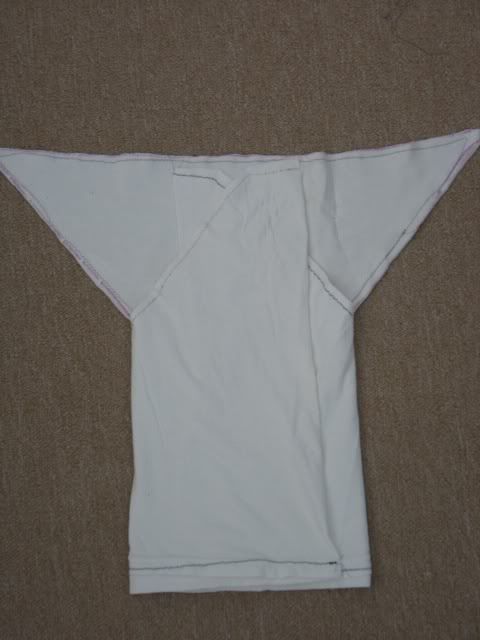
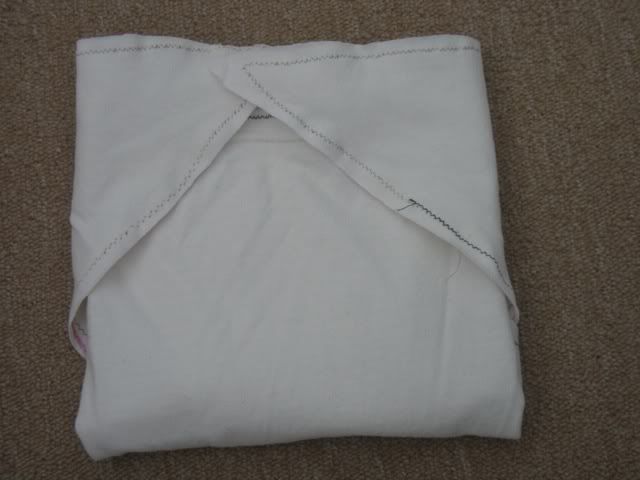
Ready for a baby! Fold in sides (this makes the soaker-6 layers when folded).
Click the image to open in full size.

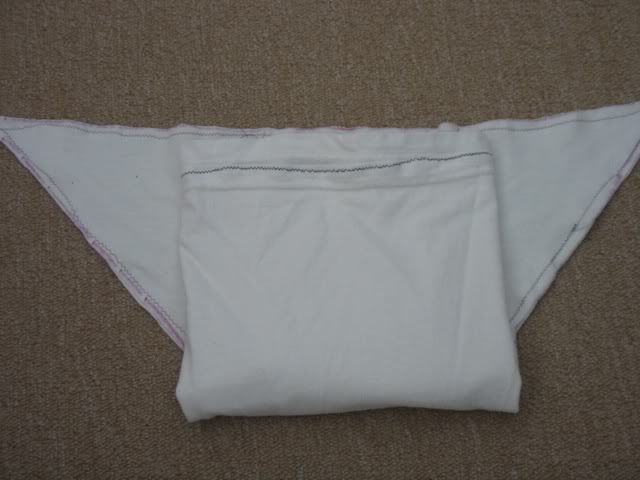
Fold up the front. If the rise is too long, just fold it down. This is pretty much a one-size diaper.
Click the image to open in full size.

The wings are nice and long...I really like it pinned with one pin in the middle. It also Snappis well. Now you have a basic white diaper.
Click the image to open in full size.

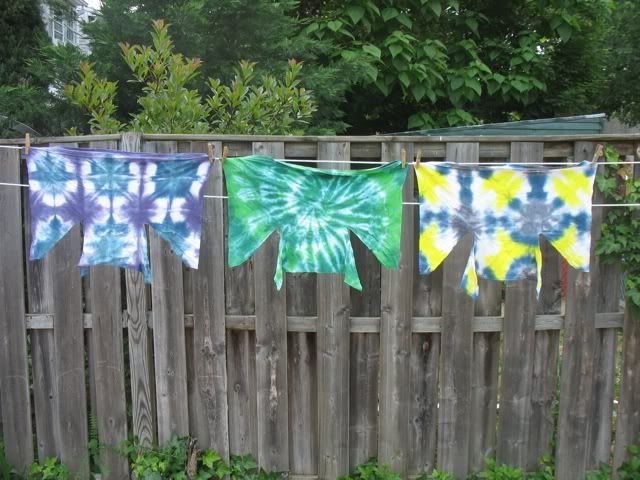
Or you can dye them and make beautiful diapers

Click the image to open in full size.

So if you have a sewing machine, internet access, and old t-shirts, you can have fairly convenient diapers for the cost of your time. The hardest part is threading the machine and winding the bobbin. Like I said, I really can't sew, but these only took a half hour each to cut out and sew. If you have any skill, you could knock out a whole stash in half a day! And you can theoretically use any material, and sew in soakers, add snaps, whatever (I haven't actually tried that yet)

Have fun!

Monday, December 6, 2010

Thoughtful Living Tuesday - Guest Post

Spa montage

I "met" Joanna at a Twitter party and asked her to write about how she uses vinegar, baking soda, and essential oils to clean her house -- I figured it was fairly simply, but didn't know the exact amounts, since I'm using a product which gives me measurements to put into their containers. But it is so simple I don't need to make those kind of purchases and can save by making my own!

Baking soda so simple

You clean your home diligently and yet more and more evidence is coming to light that the mass of luminous blue, green and yellow household cleaners that huddle underneath the kitchen sink, especially those with triclosan in, may not be a good thing in the environment.

So what are you to do if you wants a dust & grime free home but without the side effects of synthetic chemical based cleaners?

Fortunately, the solution is relatively simple; baking soda, white vinegar and a few drops of your favourite essential oil. Bingo! Household cleaner extraordinaire.

The recipe is, depending on the size of your bottle:

A few spoons of baking soda
Cautiously add some vinegar (the combination of baking soda and vinegar can be exciting, thus add slowly!)
Top up with cooled boiled water
Add a few drops of lemon or orange essential oil.

Put the lid on and shake well.

Baking soda is really effective at removing grime from ovens, baths, kitchen counter tops and I have been known to put in stinky training shoes, and dust out after a day or two. This spray cleaner can also be used on sinks, toilets and mirrors, just use an eco-cloth to remove any residue.

Vinegar is acidic and naturally good at keeping things clean. The combination of essential oils in this simple eco-friendly cleaner provides natures antibacterial agents, in the form of essential oils, and is more than enough for a normal house.

Triclosan, the common ingredient in many anti-bacterial household cleaners, was developed for hospitals and yet many American homes now have antibacterial soap, deodorants and toothpastes all containing triclosan. There is an illusion that if a little bit is good then more is best but I would disagree and say that when it comes to having a clean house, there is little substitute for soap and scrubbing, with a few essential oils.

My favourite essential oils are: organic lemon, orange and lavender. These three powerful little bottles are great for keeping your house clean but also smelling heavenly without a synthetic chemical in sight.

This winter why not aim to ditch the expensive shop bought cleaners and create your own, it will save you money as well as breathing in toxins. Are you up for the eco-friendly cleaner challenge?

To learn more about simple, effective ways to Detox your Body and our World™ with Joanna visit ActualOrganics.com

©Actual Organics 2010


Mrs Joanna Runciman, BSc(Hons), CMC
ActualOrganics.com
Detox your Body and our World™

Monday, November 15, 2010

Thoughtful Living Tuesday

Before I delivered my daughter, I had thought about cloth diapering but ended up writing it off because of the hassle. But reading about ways to live healthier lives, I realized that even though disposables are much easier, sometimes cheaper (with sales, coupons, and the drugstore game!), there are chemicals in those diapers, and those chemicals are up against my baby's skin (pretty much) constantly. Since I know very little on the subject, I asked Allyson at Go Long! Go Green! to write a guest post about her cloth diapering experiences.

When I was pregnant with my daughter, I just assumed I would use Pampers! It wasn't until a friend at church told me she cloth diapered that I was aware "modern" cloth diapering
existed! For the last 3 months of my pregnancy, I researched cloth diapers, cost savings, energy costs (our water bill only went up <$1/month), prices, etc! You name it, I looked it up! It was pretty easy to convince my husband with the cost savings alone! He also wasn't bothered by the fact we would be washing the diapers at home (as opposed to having a diaper service)! My first purchase was a starter kit of prefolds and wraps, snappi, diaper sprayer, and a large wet bag! I also received some Bum Genius One-Size Pocket diapers at my shower.

When we brought our daughter home from the hospital, we had tons of newborn Pampers Swaddlers, so we used those up! At about 3 1/2 weeks, we started our cloth diapering journey with prefolds and covers! My husband and I really enjoyed cloth diapering! We washed diapers every 3-4 days. The only drawback to the prefolds was the bulkiness in her clothes. Lots of times I had to buy the next size up in pants so they would fit!!

When time came for her first diaper rash, I scrambled looking for something to use to protect the diaper. When you cloth diaper, you don't want the diaper rash cream to touch the diaper because it will stick to the diaper, be very difficult to wash off, and eventually ruin the diaper by decreasing fluid absorption! I ended up heading to Hobby Lobby and purchased fleece scraps, cut them up in strips and laid them into the diaper so the cream would only touch the fleece! I wash my fleece strips as well, so we use them over and over again!

Over the course of our first few months diapering, we slowly built up our stash of Bum Genius One Size Pocket diapers. We found we really liked these diapers the best! They were easier to put on (especially for other family members), less bulky, and overall easier ... however with a price tag of $17.95 each, it took awhile to build up a supply! We would always use our BG diapers for our nighttime diaper! We found it held so much fluid and was easier to change in the middle of the night! At about 8 months, she started leaking through the two standard BG microfiber inserts. I found some BabyKicks Hemparoo Joeybunz hemp inserts. These are so trim and very each to stuff in the pocket diaper!! Another perk of a pocket diaper over a prefold, you can always stuff more inserts to increase the absorption!

Eventually, I had enough BG (#22), so I decided to sell all of my prefolds and covers. I wanted to get my money back for the diapers I was no longer using! Would you believe, I almost got back 90% of what I paid!! Plus it gave me a few extra $$ to get a few more BG! Currently my stash includes 22 BG 3.0 OS (the 4.0's came out recently), 1 SmartiPants Pocket diaper, and 1 Applecheeks Pocket diaper!

We still use Pampers at church in the nursery because I don't want to hassle the nursery workers (and I fear they will throw out a cloth diaper!)! We always use cloth when going to our parent's house and also we try to travel with cloth when going to a relative's house. We also used cloth during our summer camping trip!! I NEVER leave home (for overnight) without my trusty nighttime BG pocket diaper fully loaded (2 microfiber, 1 hemp, 1 cotton insert)! At 21 months, Sophia started leaking through her 3 inserts at night (most likely b/c she is holding her pee in the evening and waiting to go till bed), so we moved to 4 inserts! No more leaking problems!

I LOVE cloth diapering! It is actually even addictive ... I am constantly entering blog giveaways to win more diapers and cloth supplies! I love checking out the newest pocket diaper online! There are some other great brands as well! Cloth diapering takes a little planning (but what doesn't these days as a mother?) and thinking ahead (gotta remember to wash diapers so you don't run out), but it is so worth it! I love the fact I am doing my part to save the earth and preserve it for my children's children, but I will be honest with you ... saving $$$$ is a huge reason why we cloth diaper!! You might be thinking, how can you save money when 1 BG diaper is $17.95? To which I say, you can get 20 BG for less than $350. You will have all you need from newborn to potty-training in that one diaper (b/c it is a one-size, grows with the child). A typically family spends $50-60/month on Pampers ($600-700/month). You will have paid for all your diapers in the babies first 6 months of life! If/When you have additional children, your savings are HUGE because you don't have to put any money upfront!

Remember, every family is different and everyone has their favorite cloth diaper or two! You don't have to spend $17.95 on a diaper -- there are cheaper options! However, we found pocket diapers (specifically Bum Genius) worked best for our family!!

If you have any cloth diapering questions, please don't hesitate to email me allyson dot long at yahoo dot com